Category: Linux

  • cld2 – Google’s Compact Language Detector 2 – standalone command line on Cent OS

    It appears that cld2 has no mention of how one would go about using it (or at-least that is the way it looks to me). The language detection ability is one of the better ones, and I decided to make use of it.

    I came across a blog mentioning how to install cld2 on ubuntu but it just fell short of using it directly through a command line. It mentions how to build a Python binding.

    Luckily, I also came across another blog where a Slackware script mentions building a command line tool which is perfectly what I was looking for, except that I had CentOS, not Slackware.

    So with a little bit of digging around the various compile scripts on cld2’s SVN trunk, I got a faint sense of combining the ideas from these two blogs, and give it a try. I succeeded! Here’s what I did

    1. Get g++, it is required to build cld2 on your CentOS machine
      $ /usr/bin/sudo /usr/bin/yum install gcc-c++
      ...
      $ which g++
      /usr/bin/g++
      
    2. Get the cld2 source through SVN on your local CentOS machine. In my case I used /tmp folder
      $ pwd
      /tmp
      $ svn checkout http://cld2.googlecode.com/svn/trunk/ cld2
    3. Next, make a copy of one of the already existing compile scripts to make a few changes, specifically compile_libs.sh. The step is mentioned already in how to install cld2 on ubuntu. I use 32-bit, hence I use the same step remove the -m64 flag.
      $ pwd
      /tmp/cld2/internal
      $ cat compile_libs.sh | sed 's/\ \-m64\ //g' 1> compile_libs_32bit.sh
      
    4. To make a standalone cld2 executable, again I followed the steps from Slackware script example. I made following changes to my copied compile script. Here’s a diff of what changes I made from compile_libs.sh to my custom compile_libs_32bit.sh script
      https://gist.github.com/visitsb/8affec514ef5829c6bd0/revisions
    5. That’s it! Now compile_libs_32bit.sh is ready to build a standalone cld2 executable on your machine. It is just a matter of executing your custom compile_libs_32bit.sh script now
      $ chmod u+x compile_libs_32bit.sh
      $ ./compile_libs_32bit.sh
      
    6. It takes a few mins to build, and voila, you have a standalone cld2 executable built, and installed on your machine.
      $ which cld2
      /usr/local/bin/cld2
      $ echo "Hello World こんにちは γει? σου" | cld2
      ExtLanguage Japanese(35% 3904p), GREEK(33% 1024p), ENGLISH(27% 1194p), 45/43 bytes of non-tag letters, Summary: Japanese*
        SummaryLanguage Japanese(un-reliable) at 8391021 of 43 562us (0 MB/sec), (null)
      
    7. For the record, here is what get’s installed
      $ which cld2
      /usr/local/bin/cld2
      $ ls -l /usr/include/cld2/*
      /usr/include/cld2/internal:
      total 52
      -rw-r--r--. 1 root root 28159 Jun 20 17:49 generated_language.h
      -rw-r--r--. 1 root root  5839 Jun 20 17:49 generated_ulscript.h
      -rw-r--r--. 1 root root   945 Jun 20 17:49 integral_types.h
      -rw-r--r--. 1 root root  8326 Jun 20 17:49 lang_script.h
      
      /usr/include/cld2/public:
      total 24
      -rw-r--r--. 1 root root 14850 Jun 20 17:49 compact_lang_det.h
      -rw-r--r--. 1 root root  7056 Jun 20 17:49 encodings.h
      $ 
      $ ls -l /usr/lib/libcld2*
      -rwxr-xr-x. 1 root root 6457627 Jun 20 17:49 /usr/lib/libcld2_full.so
      -rwxr-xr-x. 1 root root 1742462 Jun 20 17:49 /usr/lib/libcld2.so
      $ 
      

    Hope this helps someone, and kudos to cld2 for being awesome!
  • https in 5 easy steps

    Simple 5 step guide to setting up https with your own self-signed certificate
    Prerequisites: Apache2, Ubuntu Server

    1. Generate local keypair
      /usr/bin/openssl genrsa -des3 -out {your domain name}.key 3072
    2. Create self-signed certificate
      /usr/bin/openssl req -new -key {your domain name}.key -x509 -out {your domain name}.crt

    3. Configure your host on port 443 to use the certificate
      <VirtualHost {your ip}:443>
      ...
      SSLEngine on
      SSLCertificateFile {path where certificate is}/{your domain name}.crt
      SSLCertificateKeyFile {path where key file is}/{your domain name}.key

      SetEnvIf User-Agent ".*MSIE.*" nokeepalive ssl-unclean-shutdown
      ...
      </VirtualHost>
    4. Optional: If you do not want to enter key password each you restart Apache, you can embed the password in key itself.
      /usr/bin/openssl rsa -in
      {path where key file is}/{your domain name}.key -out {path where key file is}/{your domain name}.key.nopass
      Remember to update your Apache configuration to use the new file
      # SSLCertificateKeyFile {path where key fileis}/{your domain name}.key
      SSLCertificateKeyFile {path where key file is}/{your domain name}.key.nopass
    5. That’s it view it. Restart your apache to load the new configuration. And try accessing your url with https://

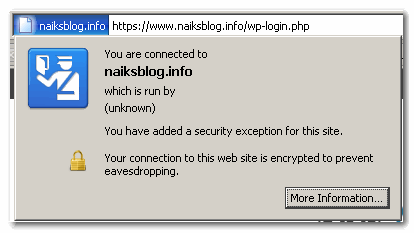
    If you receive a certificate warning, simply accept it, and proceed. Congratulations, your communication is now encrypted, and safe from prying eyes!

    Self-signed certificate

  • Interesting alternatives to databases in opensource

    I stumbled upon this url. The list of various options on databases is pretty amazing.

    http://www.webresourcesdepot.com/25-alternative-open-source-databases-engines/

    It’s a definite read. I never knew so many existed.

  • SSH : Forwarded connection refused by server: Administratively prohibited [open failed]

    Change localhost to 127.0.0.1 and it should work. 🙂

    If that doesn’t solve it, problem might be in sshd_config or authorized_keys2 – Metawerx Wiki: SSHTunnelTroubleshooting.

  • Solr replication

    1)On solr.master:
    +Edit scripts.conf:
    solr_hostname=localhost
    solr_port=8983
    rsyncd_port=18983
    +Enable and start rsync:
    rsyncd-enable; rsyncd-start
    +Run snapshooter:
    snapshooter
    After running this, you should be able to see a new folder named snapshot.*
    in data/index folder.
    You can can solrconfig.xml to trigger snapshooter after a commit or
    optimise.
    
    2) On slave:
    +Edit scripts.conf:
    solr_hostname=solr.master
    solr_port=8986
    rsyncd_port=18986
    data_dir=
    webapp_name=solr
    master_host=localhost
    master_data_dir=$MASTER_SOLR_HOME/data/
    master_status_dir=$MASTER_SOLR_HOME/logs/clients/
    +Run snappuller:
    snappuller -P 18983
    +Run snapinstaller:
    snapinstaller
    
    You should setup crontab to run snappuller and snapinstaller periodically.

    Re: Solr replication.

  • vim Settings in the File You’re Editing

    Vim scans the first and last few lines of the file for modelines, if the modeline option is on (which it is, by default). If it finds any it will apply those settings as if you had typed them in manually using :set in command mode.

    #!/bin/sh
    # vim:ts=2:sw=2:expandtab
    

    Übergibson: Embedding vim Settings in the File You’re Editing.

  • kill zombie process’s – Ubuntu Forums

    ps -A -ostat,ppid,pid,cmd | grep -e '^[Zz]'
    To find zombie processes

    kill zombie process’s – Ubuntu Forums.

  • Server upgraded to new Ubuntu 9.04 server

    The website is up, and running on a brand new OS – Ubuntu 9.04 Server. Supercool to configure, has pre-configured LAMP, OpenSSH out-of-the-box.
    Using the UFW was too easy than messing with iptables, or routing.
    Feeling great having refreshed up my home server with a mature OS.

  • Run a job every first Sun of a month

    I came across an interesting cron issue recently. The requirement was to run a job every _first_ Sunday at 12:00PM of each month.

    After searching across various sites, skimming through cron manpages, I finally found the following one-liner

    0 0 1-7 * 0 <user> <job>

    Can you believe this simple solution? The reasoning is that Sun will be between 1 to 7th of each month. Once a Sun comes, the job will execute between 1st and 7th just once. After that any further Sundays will have a date greater than 7, and thus never execute!

    Sometimes, the simplest solution is the most elegant. BTW, I had read about many other complicated solutions, such as having your own logic to determine the day, apple script, bash script solutions. I was about to give up, when I hit the jackpot! 😀